Certified Mail is a service offered by the U.S. Postal Service (USPS) that provides proof of mailing and delivery. It’s often used for important or legally sensitive documents, anytime you need verification that your mail reached its recipient.
Below, we’ll walk you through exactly how to send certified mail, what forms you’ll need, and when to use it. If you are just here to purchase certified mail envelopes, we can also help with that by following this link –> purchase now

What Is Certified Mail?
Certified Mail gives you:
- Proof of mailing: a receipt with a tracking number
- Delivery confirmation: available online or by mail
- Official record: USPS keeps a copy of the delivery record for two years
It’s an inexpensive way to ensure critical documents are received, and to have a paper trail if they’re not.
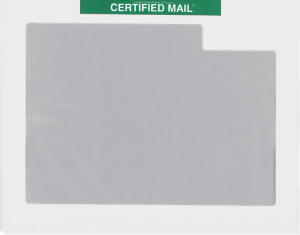
Certified Mail provides digital verification of delivery status, including completed and attempted deliveries. Send important documents with confidence and security. Our Certified Mail Envelopes are specially designed to meet USPS Certified Mail® requirements, providing proof of mailing and delivery for your most critical correspondence. Made from durable, high-quality paper stock, these envelopes protect contents while offering a professional appearance. Each envelope is formatted to work seamlessly with certified labels and barcodes, ensuring smooth processing through the postal system.
When You Should Use Certified Mail
Certified Mail is commonly used for:
- Legal notices (eviction, court summons, contracts)
- Tax documents sent to or from the IRS
- Insurance or medical claims requiring proof of receipt
- Government correspondence
- Employment or HR records (termination, compliance letters)
- Real estate and financial communications
Basically, anytime you need proof that someone received something important, Certified Mail is the right choice.

How to Send Certified Mail (Step-by-Step)
Here’s how to send Certified Mail at any USPS location — or prepare it from your office using Certified Mail Envelopes.
Step 1: Prepare Your Mail
Place your document inside a Certified Mail-compatible envelope.
Seal the envelope securely.
Step 2: Fill Out the Certified Mail Form (PS Form 3800)
This is the familiar green-and-white form available at any post office.
It includes a unique tracking number.
- Write your recipient’s name and address
- Write your return address
- Peel off the tracking barcode and attach it to your envelope (top edge)
Tip: Using certified mail envelopes with pre-printed form alignment makes this step much faster and reduces errors.
Step 3: Choose Optional Services
You can add:
- Return Receipt (PS Form 3811) — the “green card” signed by the recipient
- Electronic Return Receipt — digital delivery confirmation
- Restricted Delivery — only the named recipient may sign
Step 4: Pay for Postage
You can pay:
- At the post office counter, or
- Online via USPS.com (print labels from home)
You’ll receive a receipt with a tracking number — keep this for your records.
Step 5: Track Delivery
Use your tracking number on USPS.com/Tracking to see when your item is delivered.
If you added Return Receipt, you’ll receive confirmation once it’s signed for.


